

 +86 15814116500
 Views: 0 Author: Site Editor Publish Time: 2026-09-11 Origin: Site


Imagine a customer finds a broken needle in a garment from your line. That one event can cause a costly recall and hurt your brand’s image in garment manufacturing. A recall costs money and also makes customers lose trust. Stores may charge you fees for not following rules. A needle detector is the best way to stop these problems. How do you pick the right one without paying for extras you don’t need or leaving your brand at risk? This guide makes the choice easier, explaining different types, key specs, and rule requirements. After reading, you’ll know how to check sensitivity, calibration, and machine size. You’ll learn to match the machine to your work flow, output amount, and budget, so you can buy with confidence and good information.
A needle detector stops expensive recalls and keeps your brand safe from harm.
Specialized needle detectors find tiny iron fragments that regular metal detectors miss.
Adjust the detector's sensitivity to match your thickest fabric so it won't wrongly reject good items.
Pick a machine size that fits your biggest product to avoid detection dead zones.
Retailers need to check for every single needle and keep written records to prove they follow the rules.
Write down each time a needle breaks and when you calibrate the machine. This helps you pass outside checks.
Think about all the costs of owning the machine, like when it wrongly rejects items and the upkeep it needs.
Test your machines with your own products, and set up training to make sure everything works well.
Every sewing business has the same hidden problem. Needles break while making products. They snap when pulled tight, when hitting thick fabric, or after many stitches. The broken piece can land inside a shirt, a toy, or furniture. You may not see it. Your customer will find it in a bad way. That moment changes a normal work day into a big problem.
One broken needle missed by detection can cause a full product recall. You have to take back every batch that might have the broken piece. You pay for shipping, storage, and throwing away. You also pay for replacement items. The money loss adds up fast. Small sewing businesses usually cannot survive a big recall. Even big companies feel the pain for years.
The harm is not just about money. Your brand name holds trust. When customers learn about needle pieces in products, they doubt your quality checks. Stores also see it. They might stop selling your items. Social media spreads the news quickly. One problem can ruin years of hard work building a good name. A needle detector is your last safety check before products go out.
Big stores have strict rules for suppliers. They want proof that you check products for broken needles. If you fail a check or send a bad batch, they charge you back. These fees pay for their handling costs, customer refunds, and office work. The money can be thousands of dollars for each problem.
Rules‑breaking fines add more trouble. Many buyers ask for written proof of your needle checking process. They might send outside inspectors to look at your factory. Without a good detection system, you could lose important deals. Competitors with the right tools will take over. The cost of stopping problems with a needle detector is much less than the cost of not following rules.
Sewing needles are made from ferrous metals. These materials contain iron and respond to magnetic fields. Specialized needle detectors exploit this property. They generate a magnetic field and sense disturbances caused by ferrous fragments. This focused approach delivers exceptional sensitivity for the specific threat you face.
General‑purpose metal detectors cast a wider net. They detect ferrous metals, non‑ferrous metals like aluminum and copper, and stainless steel. This broad capability suits food processing or pharmaceutical lines. However, the wider focus often means lower sensitivity for tiny ferrous fragments. A broken needle tip measures just a few millimeters. You need equipment optimized for that exact challenge.
Regular metal detectors have trouble with small needle pieces for many reasons. Their sensor coils are set for bigger bits. They might skip signals that are too weak. The product itself can mess up the reading. Thick fabrics, many layers, or metal buttons cause background noise. A general machine might see a needle piece as normal variation.
Specialized needle detectors use smart signal processing to remove these problems. They focus only on the magnetic signal of ferrous metals. This lets them find tiny pieces that regular metal detectors would miss. The result is better protection for your sewn items. You lower the chance of bad products getting to customers. You also cut down on false rejections that waste good items and slow your work.
Buying the right needle detector keeps your brand, your customers, and your profits safe. It is not just a quality tool. It is important insurance for your sewing business.
A magnetic needle detector creates a focused magnetic field around the inspection area. When a broken needle fragment passes through this field, the ferrous metal disturbs the magnetic balance. The system detects this disturbance instantly and triggers an alarm. This technology targets exactly what you need to find: iron-based needle fragments.
The key advantage lies in the focused approach. Sewing needles contain iron, which responds strongly to magnetic fields. A magnetic system ignores other distractions and locks onto the ferrous signal. This precision allows the equipment to catch fragments as small as 1.0–1.2 mm, which matches the size of broken needle tips commonly found in production. You can run daily sensitivity checks using standard test pieces to confirm the machine performs correctly.
Selection Factor | Standard Metal Detector | Specialized Needle Detector |
|---|---|---|
Sensitivity to small fragments | Struggles with very small contaminants | Specifically designed to detect broken sewing needles |
Product Type Suitability | Affected by product noise (moisture, salt) | Designed for apparel and textile products |
Compliance & Standards | May not meet strict industry guidelines | Helps meet textile industry safety standards |
General-purpose metal detectors use broad electromagnetic fields to find many metal types. They detect aluminum, copper, and stainless steel alongside ferrous materials. This wide range works well for food processing lines. For sewn products, however, this approach creates problems.
Thick fabrics, multiple layers, and dense materials produce background noise that confuses general systems. A padded jacket or folded denim can mask a small needle fragment completely. The machine reads the fabric density as normal variation and misses the actual threat. Non-magnetic systems also struggle with products that contain moisture or other conductive elements, which further degrades their performance on textiles.
Specialized needle detection equipment overcomes these issues through intelligent signal processing. The system filters out fabric noise and focuses only on ferrous disturbances. You can tune the sensitivity for specific materials like nonwoven fabrics or heavily padded items. This tunability prevents the masking effect that causes false negatives in general-purpose units.
Your production line layout determines which model type fits best. Conveyor models move products automatically through the detection zone. Operators place each item on the belt, and the machine inspects it at a consistent speed. This option suits high-volume operations where you need steady throughput and minimal handling.
Non-power models require operators to pass each product over the detection surface manually. These units work well for smaller batches, custom pieces, or items with irregular shapes that do not travel well on a belt. You gain flexibility in handling delicate garments or products that need special positioning. The trade-off involves slower inspection rates and greater operator involvement.
Consider your daily output volume when choosing between these options. A conveyor system processes hundreds of items per hour with consistent results. A non-power model gives you control over each piece but demands more labor. Match the machine to your actual workflow rather than buying extra capacity you do not need.
Factory floor space often determines which model you can install. Conveyor systems require dedicated floor area for the belt, the detection tunnel, and the rejection mechanism. You also need clearance for operators to load and unload products comfortably. Measure your available space before committing to a conveyor configuration.
Non-power models occupy significantly less space. You can place them on existing tables or workstations without major layout changes. This flexibility suits smaller sewing operations or facilities where production lines shift frequently. You can move the unit to different stations as your workflow changes.
The aperture size matters in both configurations. This opening must accommodate your widest and thickest products without crowding. A product that barely fits through the aperture risks inconsistent detection results. Measure your maximum product dimensions and compare them against the machine specifications. COSO Electronic offers both conveyor and non-power models, so you can match the equipment to your production scale and available space.
Sensitivity controls what your machine can find. It also controls how often your machine stops for no reason. You need the right balance for your products. Too little sensitivity lets broken needles slip through. Too much sensitivity stops your line for harmless signals. Knowing detection limits helps you find that balance.
Sewing needles contain ferrous metal, meaning they have iron. This iron reacts strongly to magnetic fields. A magnetic needle detector uses this trait to locate broken pieces. It ignores materials without iron. This focus makes the machine work well for your specific risk.
Non-ferrous metals like aluminum, copper, and brass do not react to magnetic fields. Stainless steel brings another issue. Some stainless steel types have enough iron to trigger a response. Others do not. Most sewing needles fall into the ferrous group, so you need a machine that finds iron-based pieces well.
The sensitivity rating shows the smallest piece the machine can find. Makers list this rating as a steel sphere diameter. For garment work, the two common limits are 1.2 mm and 0.8 mm. The 0.8 mm rating means finer detection ability. Product specs for needle detectors list several ferromagnetic sensitivity choices:
Fe: 0.6-0.8mm
Fe: 0.8mm
Fe: 0.8-1.0mm
Fe: 1.0-1.2mm
Fe: 1.2-1.5mm
The Fe 0.8mm limit stands as a common option across commercial machines. Modern commercial needle detectors can find metal pieces as small as about 0.8 mm. Some handheld units offer even finer detection. In high sensitivity mode, one portable model finds pieces down to 0.5 mm. In low sensitivity mode, that same unit finds down to 0.9 mm.
Sensitivity: Fe Φ 0.8mm
This spec appears on many platform-type needle detectors. It tells you the machine finds ferrous spheres measuring 0.8 mm across at the center of the detection field. That size matches the broken needle tips you face in production.
Your fabric affects how well the machine works. Light cotton shirts let strong signals pass through. Heavy denim, padded jackets, and multiple layers absorb or scatter the magnetic field. A piece that triggers an alarm in a thin blouse might go unnoticed inside a quilted coat.
You must set your sensitivity limit based on your heaviest product. Test the machine with your thickest fabric and your smallest acceptable piece. If the machine finds the piece through the heaviest material, your limit works. If not, you need a more sensitive setting or a different opening setup.
Start with the finest setting your machine offers. Run test pieces through the system. Watch how often the machine rejects clean products. If false rejections happen too often, raise the limit slowly. Write down the setting that catches real pieces without stopping your line for clean items. This tuning process takes time but prevents costly mistakes later.
Every time your machine stops for a false alarm, your line stops too. An operator must check the rejection. They must inspect the product by hand. They must reset the system. This process takes minutes. Multiply those minutes by dozens of false alarms each day, and you lose hours of production time.
False rejections also waste good products. A machine that triggers on clean items forces you to throw away or fix those pieces. You lose the materials, the labor, and the time spent on those products. For high-volume sewing operations, this waste adds up fast.
Poor tuning often causes these problems. Wrong sensitivity settings or ignored tuning lead to unstable readings and unreliable performance over time. You should tune your machine every 3–6 months. This schedule keeps the system accurate and cuts down nuisance stops.
Modern needle detectors use smart technology to tell real threats from background noise. Smart signal processing filters out signals from fabric density, moisture, and other harmless changes. The system focuses only on the magnetic mark of ferrous pieces.
Special foil-capable detectors use packaging-signal blocking and multi-frequency detection with custom coil designs. These signal processing methods filter out interference while keeping high sensitivity for true metal contaminants. This approach stops unnecessary nuisance trips and false rejections.
The result is a machine that catches real problems without stopping your line for harmless signals. You keep high output while ensuring product safety. Your operators trust the machine because it rarely fails them with false alarms.
COSO Electronic's needle detectors feature easy operation and display functions for quick tuning. You can adjust settings without much training. The clear displays show you exactly when the machine finds a piece. This simplicity cuts operator error and keeps your line running smoothly.
Metal detectors in general serve different purposes across industries. General-purpose metal detectors find a wide range of contaminants. Specialized needle detection equipment focuses only on ferrous pieces in sewn products. You need the specialized approach for your sewing business.
The right sensitivity setting protects your customers and your brand. The right tuning schedule keeps your machine reliable. Together, these practices cut waste, keep output steady, and ensure every product leaves your facility free from broken needles.
Your needle detector should fit your products, not the other way around. A machine with the wrong opening size causes blind spots. Products that barely squeeze through the aperture give unreliable results. You need to measure your actual product sizes before you compare models.
First, measure your widest finished item. If you check sealed products, include the packaging. Lay the item flat and measure its full width. This number tells you the smallest conveyor belt width you need. A belt too narrow makes workers angle products, causing uneven readings.
Next, measure your thickest product. Stack layers as they appear in real production. A folded sweater is thicker than a single layer of knit fabric. The aperture height must clear this maximum thickness with room to spare. You want at least 20-30 percent extra space above your thickest item. This margin stops products from catching on the opening edges.
Write these two numbers clearly. Put them on your spec sheet. Share them with equipment suppliers when you ask for quotes. A good manufacturer will suggest the right aperture size based on these measurements. COSO Electronic's team often helps customers match machine dimensions to their product lines.
Every needle detector has spots where sensitivity drops. These zones appear near the edges of the detection aperture. The magnetic field gets weaker close to the metal frame. A needle fragment passing through these edges might escape detection entirely.
You avoid dead zones by choosing an aperture larger than your product. The extra space keeps your items inside the strongest part of the magnetic field. For example, a product 400 mm wide needs a detection aperture at least 500 mm. This buffer gives even sensitivity across the whole product surface.
Test your actual products through the machine before you buy. Run test pieces with known needle fragments at different spots. Place them at the center, near the edges, and at various heights. This check confirms the machine finds fragments throughout your product's path. Do not skip this step. A machine that misses fragments at the edges gives false safety.
Conveyor speed directly affects detection accuracy. Faster belts give the sensor less time to analyze each product. The magnetic field must register the disturbance, process the signal, and trigger the alarm. At high speeds, this sequence happens in milliseconds.
Most needle detectors work well at moderate conveyor speeds. You must find the balance between throughput and reliable detection. A machine running too fast may miss small fragments. A machine running too slow creates a bottleneck in your production line.
Think about your daily output targets. Calculate the number of items you need to inspect per hour. Divide this number by your operating hours to get your needed inspection rate. Then check that the conveyor speed reaches this rate without losing detection reliability. COSO Electronic's customer story shows this idea well. A nonwoven fabric manufacturer needed to inspect wide materials at slower speeds. The customized system fit the material width while keeping the slower conveyor pace needed for accurate detection.
Your needle detector should fit smoothly with your current workflow. Measure the height of your existing conveyor systems. The detector's infeed and outfeed heights must match. Otherwise, products get stuck at the transition points.
Think about the physical layout of your facility. Does the detector fit between your folding station and packaging line? Can workers access the machine easily? Will the rejection mechanism get in the way of nearby equipment? Draw a simple floor plan showing the detector's proposed spot. Mark space for maintenance access and worker movement.
Plan for future changes too. Your product line may grow. You might add new fabric types or larger items. Choose a machine with some adjustment range in its aperture. This flexibility makes the equipment last longer. You avoid replacing the whole system when your product dimensions change slightly.
The right machine size protects your detection accuracy while fitting your operational reality. Measure carefully, test thoroughly, and plan for integration. These steps make sure your needle detector works as part of your production line, not against it.
Retailers and buyers set strict rules for sewing businesses. They want proof your products have no broken needles. If you do not meet these rules, you can lose important contracts. Knowing what buyers expect helps you get your factory and paperwork ready.
Big stores enforce formal needle policies for textiles and toys. These policies require 100% needle detection before packing. Checking just a few samples is not enough. Every garment that is ready to ship must go through detection one by one.
Buyers also want calibration that matches their rules. Most set sensitivity at 1.0–1.2 mm or as needed for the product type. Your machine must meet these exact numbers. You also need packaging with no metal. Polybags and cartons must pass through scanning without setting off alarms.
Retailer Mandate | Practical Implementation |
|---|---|
100% needle detection before packing | Every garment ready to ship goes through detection, not just samples |
Calibration that matches buyer rules | Sensitivity set at 1.0–1.2 mm or as needed |
Compliance and traceability | Good records and compliance logs are kept |
Re-inspection after risk increases | Re-scan alarmed garments by hand after repairs |
Zero-tolerance policy | Broken needles are collected and written down no matter the order size |
Packaging with no metal | Polybags and cartons are checked to be metal-free before scanning |
Outside inspectors may show up at your factory without warning. They check your detection machines and your records. They look at calibration logs, rejection reports, and operator training papers. Every document must have proper signatures from quality assurance staff.
Your needle control register must track every needle change and break. Operators write down the date and time of each event. They record the machine number and their own name. They tape broken pieces directly into the log. A supervisor checks each entry with a signature. You keep these records for at least one year.
Makes sure you follow safety rules (e.g., for baby clothes) – needle detectors used for sensitive textile products must meet special safety rules beyond normal quality standards.
Worldwide certifications make your audits stronger. The CE mark shows the machine meets health, safety, and environment rules for the European Economic Area. ISO 9001 shows you have a quality management system that meets international needs. RoHS rules confirm your equipment has no forbidden dangerous substances. COSO Electronic's solutions help makers meet these rules, as shown in their case studies with nonwoven fabric producers.
Data logging turns your needle detection process into a system you can check. Each scan creates a record. Each alarm makes a rejection report. Each calibration creates an entry with a time stamp. This paperwork backs up your quality control program during audits and customer questions.
Operators follow strict steps for every broken needle. They write down the break right away. They attach all broken pieces to the record. They explain what fix they did. A supervisor checks the entry before closing the event. These steps keep customers safe and prevent brand harm. Export buyers like Walmart, Target, and Carrefour require this level of records.
Modern needle detectors connect directly to your business planning system. Real-time digital logs flow by themselves into your quality management platform. This link gives you full traceability from needle issue to final check.
You can see your detection performance right away. Managers look at rejection trends without going to the factory floor. Quality teams spot problems that keep happening before they turn big. The system reminds you about calibration deadlines by itself. This automation cuts down human mistakes and makes audits easier.
Daily checklists become digital records. Operators confirm calibration status at shift start. The system records the time of each check. This data backs up your compliance claims with hard proof. When a buyer asks for traceability papers, you can get full reports in minutes.
The right needle detector does more than find broken needles. It creates a full compliance system. It protects your customers, your brand, and your store relationships. Buying detection equipment with strong data features sets your sewing business up for long-term success.
The price on a quote is only part of the picture. A needle detector costs money every day it runs. It uses electricity, needs test pieces, and takes operator time. When you compare machines, look past the sticker price. Figure out the full cost over five years. That number shows which option really saves money.
Setup costs differ by machine type. A non-power model sits on a table you already have. You plug it in and start testing. A conveyor system needs assembly, alignment with your current line, and sometimes electrical work. These setup costs add to your starting investment.
Training creates another expense. Every operator must learn to load products correctly, read alarms, and handle rejections. Supervisors need calibration training. Maintenance staff must know routine care. Add in the hours spent on this training. A machine with easy controls lowers these costs a lot. COSO Electronic builds its needle detectors for simple use, so your team learns fast and gets back to work sooner.
Calibration needs standard test pieces. These small iron spheres come in set sizes like Fe 0.8mm or Fe 1.2mm. You need several pieces for daily checks. Test pieces wear out or get lost over time. Plan to replace them often.
Your calibration schedule also affects costs. Daily checks take five minutes per shift. Weekly checks take longer. Each check needs an operator to pause production briefly. Add those minutes across a year. The time adds up. Pick a machine with simple calibration steps. Easy steps mean fewer errors and less downtime.
Every false rejection costs you money. The machine stops. An operator removes the product. Someone checks it by hand. If the product is clean, you must choose to rescan it or toss it. Rescanning takes time. Tossing wastes materials and labor.
Think about a simple case. Your line makes 500 garments per hour. The machine falsely rejects 2 percent of them. That means ten good garments stop every hour. Each garment took minutes to sew and check. You lose that production value. Over an eight-hour shift, eighty garments face extra handling. Over a year, that waste grows large.
Poor sensitivity settings often cause these false alarms. A machine set too fine reacts to fabric density changes or background noise. Smart signal processing cuts these nuisance stops. The technology filters out background interference while keeping detection accuracy. You keep good products moving and avoid wasting valuable materials.
Better sensors cost more upfront. They also reject fewer clean products. They hold calibration longer. They handle tough materials without constant tweaks. These benefits turn into lower running costs.
Look at the return on investment. A top sensor that cuts false rejections by 1 percent saves hundreds of hours each year. It stops needless product waste. It keeps your line moving at full speed. These savings often beat the price gap within the first year.
Durability also counts. Industrial metal detectors built with strong parts handle nonstop use. They resist vibration, dust, and temperature shifts. They need fewer repairs and replacements. COSO Electronic builds its equipment with industrial-grade materials made for tough factory settings. This build lowers long-term repair costs and extends the machine's life.
The cheapest machine often ends up the most costly choice. It may fail an audit due to uneven performance. It may reject too many good products. It may break down often. When you figure total cost of ownership, reliability and accuracy matter more than the starting price. A quality needle detector protects your products, your name, and your profits.
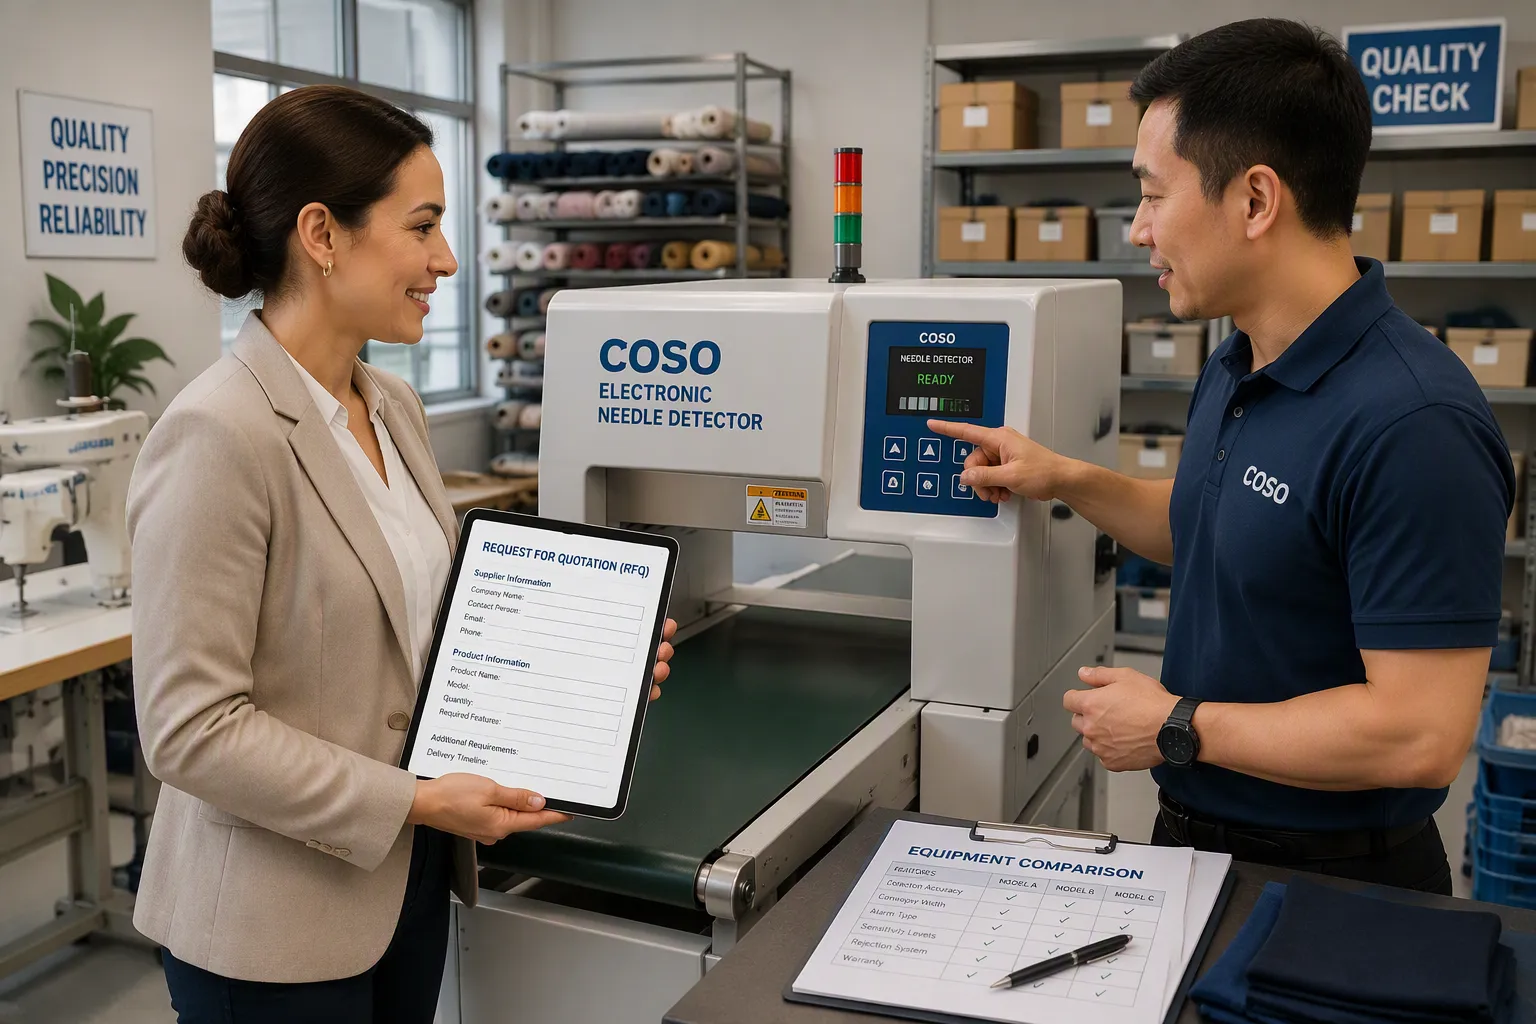
You have now looked at sensitivity ratings, opening sizes, belt speeds, rule requirements, and long-term costs. Each factor narrows your choices. The last step turns your research into a real buying decision. A clear plan helps you avoid costly errors and makes sure the machine you pick truly fits your sewing work.
A good RFQ does more than ask for a price. It tells suppliers exactly what you need so they can offer the right machine. Vague requests lead to vague answers. Specific requests lead to clear proposals you can compare easily.
Start your RFQ with your product sizes. State your widest and thickest product clearly. Include how many items you make each day and how fast you want the belt to move. Mention your fabric types, especially if you use heavy layers or nonwoven materials that change detection sensitivity.
List your sensitivity needs next. State the iron sphere size your products require, such as Fe 0.8mm or Fe 1.2mm. Say whether you need to find only iron metals or other contaminants too. Your rule requirements belong in this section as well. Name the retailer standards you must meet and any certifications your buyers ask for.
Describe your facility limits. Note your open floor space, power supply, and connection points with current equipment. If you need data logging or ERP hookup, say so clearly. The more details you give, the better your supplier can tailor their suggestion.
COSO Electronic's needle detector product page shows the range of available setups. You can review conveyor and non-power models, compare sensitivity options, and learn standard features before you send your RFQ. This prep helps you ask smart questions and judge responses carefully.
Paper specs tell only part of the story. You need to see the machine working with your real products. Ask for a demo using your own fabric samples and test pieces. A good supplier will welcome this chance.
Get test samples ready before the demo. Include your thickest product, your most delicate fabric, and items with metal parts like buttons or zippers. Bring known needle pieces in different sizes. Run these samples through the machine at different belt speeds. Watch how the system handles each product type.
Pay attention to false rejection rates during the test. A machine that stops often on clean products will slow your work and waste materials. Ask the supplier to explain how their signal processing handles background noise from dense fabrics. The COSO customer story shows this point well. A nonwoven fabric maker needed to scan wide materials moving slowly through their line. COSO provided a special system with an extra-wide conveyor belt of 2350 mm and a height of 120 mm to scan the full volume of wide-format materials. The system found tiny metal pieces before the fabric left the factory, stopping costly recalls and keeping customers safe.
Your new needle detector only helps when your team runs it correctly. Planning for setup and training before the machine arrives cuts downtime and stops early errors. A clear rollout plan protects your investment and keeps your production line moving well.
Standard operating procedures turn best practices into repeatable steps. Every operator follows the same process, reducing errors and ensuring consistency. Your SOPs should cover machine prep, calibration, operation, and incident response.
Begin with machine prep. The equipment must stay clean and organized. Only trained and approved staff should run it. Your SOP should name these people and record their training dates.
Calibration steps deserve close attention. Use a ferrous test card with sizes including 0.8 mm, 1.2 mm, 1.5 mm, and 2.0 mm. Place the card on a stand with three slots: top, middle, and bottom. This method checks detection across the full opening height. Note that exact calibration steps may change based on customer needs, so adjust your procedures to your buyer's rules.
Your SOP must also cover needle break incidents. When a needle breaks, the operator stops the sewing machine right away and tells the supervisor. They search for all pieces using a magnet, focusing on the throat plate, feed dogs, and bobbin case. Found pieces attach to a broken needle log sheet with clear tape. If pieces stay missing, the operator checks the garment and nearby area within 2 meters using a metal detector and a magnet. They set aside possibly contaminated garments and run them through the needle detector for more checks. The incident gets recorded in the broken needle log, and only approved staff handle needle replacement. Worn-out and broken needles go into sealed containers for disposal.
Your machine needs testing before it handles your first production batch. Plan this testing so it does not disturb your normal work. Set aside a full day for calibration and validation tasks.
Clean the metal detector machine fully before starting. Only trained, approved operators may turn on the equipment. Run internal calibration using a 1.0 mm or 1.2 mm ferrous test card. After every restart, recalibrate before checking any product.
Use the 9-point calibration method for full testing. Split the conveyor belt into three zones: A, B, and C. Pass the test card at three heights: the center slot at 1.5 inches and the top slot at 3 inches. Record results as Y when the alarm sounds or N when no reaction happens. If any zone shows N, stop the machine, call the supervisor, and hold all production since the last good calibration. Only trained technicians may fix the machine. After repair, repeat the full 9-point calibration.
Keep records of hourly calibration reports and production logs. These documents prove your compliance during audits and build buyer trust. Set detector sensitivity to less than 1.0 mm sphere to find the calibration card. Use only the calibration card and holder during testing, with no paper or products on the belt.
A clear setup plan makes sure your needle detector works right from day one. Your team knows their jobs. Your calibration records show compliance. Your products leave the factory with proven safety. This prep turns your equipment purchase into a lasting quality system.
You have traveled from risk assessment to final implementation. You measured products, evaluated sensitivity, and planned for compliance. The right needle detector fits your specific workflow and compliance burden—not the most expensive option on the market.
This investment protects your brand, not just your regulatory checklist. Consider the financial reality:
Metric | Value |
|---|---|
Cost of one prevented recall | $250,000 |
System cost (purchase + installation) | $40,000 |
Cumulative ROI positive timeline | 12–24 months |
A single recall can cost $25 million in direct expenses.
Analytics-driven prevention reduces recall risk by 80%.
Precise traceability limits recall scope by up to 95%.
The cost of prevention always beats the cost of a recall. Visit COSO Electronic's website to explore needle detector options and request a consultation. Make production more efficient. Make products more reliable.
Test your machine at the start of each shift using a ferrous test card. Place the card at three heights across the detection zone. Record every result in your calibration log. This daily check catches sensitivity drift before it becomes a problem.
A needle detector focuses only on ferrous metals like broken sewing needles. Regular metal detectors search for many metal types but often miss tiny iron fragments. Your sewing line needs the specialized ferrous focus to catch needle pieces as small as 0.8 mm.
Yes. Non-power models work well for smaller batches and custom pieces. You pass each product over the detection surface manually. This option costs less and takes less floor space. Choose a conveyor model when your daily output grows beyond what manual inspection can handle.
Most commercial needle detectors offer sensitivity ratings between Fe 0.8mm and Fe 1.5mm. The Fe 0.8mm rating detects the smallest fragments. Start with the finest setting your machine offers. Adjust based on your fabric weight and how often false rejections occur.
Stop the line immediately. Remove the flagged product and mark it clearly. Run it through the detector again to confirm the alarm. If it alarms again, inspect the product by hand using a magnet. Record the incident in your rejection log with the operator's name and time.
Industrial-grade needle detectors run for many years with proper maintenance. Clean the machine regularly and follow the manufacturer's care schedule. Recalibrate every three to six months. Replace worn test pieces promptly. These practices extend equipment life and keep detection accurate.
Most major retailers require documented proof of needle detection. Data logging creates digital records of every scan, alarm, and calibration. This documentation satisfies third-party auditors and buyer compliance teams. Machines with ERP integration provide full traceability from needle break to final inspection.

